|
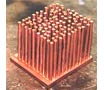
With the small section of 4mm thick
copper cut loose from the old printing plate a 4mm grid was marked over
its entire surface. A ruler and an indelible marker were used to
layout the pattern of points which were then marked with an automatic
center punch. Considering all the work that would be going on with this
little bit of copper, any markings that could come off, would have. The
punched points also served as starting points for drilling.
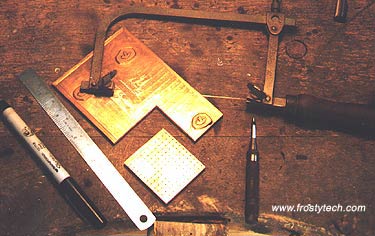 |
| The coping saw cut the copper section away, the ruler and
marker marked the points where pins would eventually go, and the hole
punch ensured those markings stayed put as we set to
work. | The 40mm X 50mm piece of copper with
all 110 pin positions marked on it was then clamped to the work bench.
Drilling the holes in the copper caused the block to reach a really high
temperature. After a few minutes of drilling it was literally too hot to
handle, this despite the fact that we were only drilling less
then 3mm into it!
For this heatsink we used a Fordom
drill to bore the holes. It's a lightweight drill which is a similar
to, but a big step up from the Dremel. The big plus with the Fordom is
better control over the drill bit and the speed at which the bit rotates
(via a foot peddle).
Masking tape marked a point 3mm
up from the tip of a 1/8" HSS bit. Since the copper plate was only
about 4mm thick, the last thing we wanted was to accidentally drill
through to the other side. With the tape on the bit it served as a visual
point from which to stop drilling.
A small canister of felt, saturated
with oil, helped to lubricate the tip of the drill bit at regular intervals
in the drilling process. Proper lubrication not only prolongs the
bits' life span but yields cleaner holes. The markings with center punch
proved invaluable to keeping the drill bit where it was supposed to be
instead of having it stray off to one side.
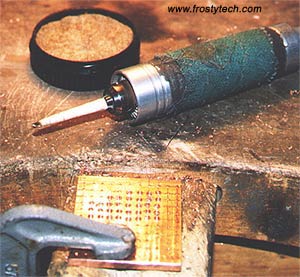 |
| Drill, oil and clamped down
copper slug as we pause half-way through the
procedure. | |